How to make easy pixel art for beginners and games.
- Edward Roscoe

- Feb 27
- 6 min read
Pixel art holds a special place in my heart as the first art I created with a professional finish. I made lots of art for the game Guilds or Elerdan for the room and its items. Making beautiful pixel art is easy if we have the right tools and break down what we are creating!
Pixel art is an artistic style that blends modern digital techniques with the structure and discipline of classical art. Whether you're designing fantasy, industrial, or medieval artwork, mastering pixel art requires an understanding of both tools and techniques. In this extended guide, we'll explore the best tools available, key concepts in pixel art, and the art of selecting and applying colour palettes effectively.

The Best Tools for Creating Pixel Art
Pixel art is a great place for new artists to start developing their craft. The limitations that are imposed help to develop skills that will improve the art of all kinds. But finding the right tool to start you on the path can be tricky.
1. Aseprite – The Gold Standard for Pixel Art
Aseprite is one of the most popular tools for creating pixel artwork. It offers essential features such as onion skinning for animation, an intuitive palette management system, and a customizable interface. It is also relatively inexpensive compared to most image editing software. It was Aseprite that I first used to create pixel art, and given my habit of getting distracted with tools and features, the streamlined nature of this tool was fantastic. The ease of copying components I had already created from one place to another made creating a game asset easier.

2. Pyxel Edit – Great for Game Assets
Pyxel Edit is optimized for tile-based pixel art, making it a good choice for game development where items will be placed onto tiles. It simplifies the creation of seamless tiles and background elements, ideal for contemporary landscape paintings. It is a strong choice for artists and has many of the same features as Aseprite, but it comes at a lower price. Personally, I will stick with Aseprite, but if you can afford both, then it might be worth trying Pyxel to see if your preference is different.
3. Krita – Free and Open-Source for Digital Artists
Krita is my go-to tool for digital art, and there is almost nothing that it can't do well. However, when you have a tool that can do anything, it often doesn't do it all equally well. Setting up Krita for work with pixel art is complicated compared to Aseprite and Pyxel. It can often feel like you are using a sledgehammer to crake a walnut. It works but is excessive in effort. The great thing about Krita is that it's free!

4. Photoshop – A Versatile but Expensive Option
Photoshop is not designed for pixel art but provides robust tools for fine-tuning realism artwork, blending base colours, and enhancing fine artwork. Similar to Krita, it does not come set up to handle pixel art or tasks such as snapping elements to pixels out of the box. My recommendation is that unless you specifically want to edit photos to a high level, you should avoid Photoshop. I have tried it and have never found any benefits over Krita for creating digital art, and as Krita is not my pick and it is free, this should be avoided for pixel art.
5. GraphicsGale – Ideal for Classic Sprites
GraphicsGale is a retro-style pixel art tool often used for game sprites. If you are aiming for a vintage aesthetic that really suits gothic and medieval artwork GraphicsGale provides a streamlined and efficient pixel workflow. It is now freeware but its feeling very dated and struggles to keep up with the features that Aseprite and Pyxel have.
Key Concepts of Pixel Art
1. Resolution Matters
The first step in pixel art is choosing the right canvas size. Keeping your first sprites small makes your life easier and allows you to practice making the most of each pixel. I recommend picking a classic size, such as 32x32; this also means you will have lots of reference art you can use for ideas.

2. Pick a perspective
I recommend two main perspectives for someone starting out with pixel art. The first is a flat orthographic view, where items are flat to you. I have always been a big fan of isometric pixel art. There are many angles that we can use for our isometric art, but I recommend 45-degree angles as this is the easiest. 45 degrees is the easiest as you can plant things in a "cube" and make this by moving up and down an two by one pixels in whatever direction the line goes.

3. Break things down
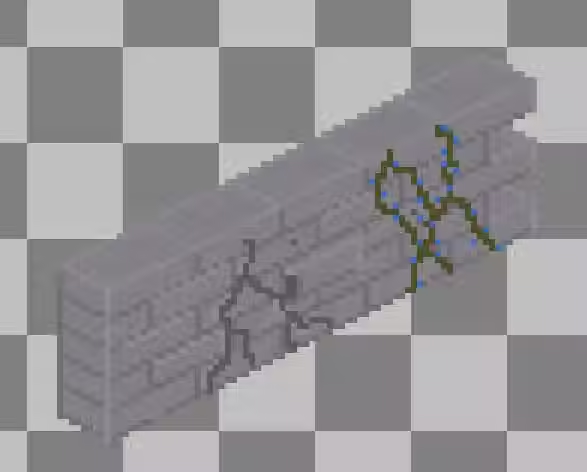
Even with pixel art, I have always been drawn to landscapes over characters. I found that creating items and combining them was a more enjoyable way to work than painting items directly into a scene. For example, when building a wall, I would start with bricks and then stack them as if I were building a wall. Or if I were creating a potion shelf, I would create the shelf and potion separately.

4. Shading and Depth with Limited Colors
It is a good rule that any art you create should look good or, at a minimum, be understandable in black and white. It can be advantageous to make your pixel art in black and white first, or if you prefer, keep applying a desaturation filter to what you have done. Most of what you need to paint can be done with a base, mid, and highlight value.

5. Merge the components into one scene
Now that we have componentisation, you may want to spend more time marrying shadows and lighting if you merge the items into the scene. For our wall, we might bring out a few of the bricks to make it look less perfect, or on our potion shelf, and we might add a cobweb to connect the bottles to the shelf.

Selecting a Color Palette for Pixel Art
Choosing colours is a vital part of pixel art, as it dictates mood and helps harmonise all of the elements of our art onto one screen.
1. Use a Limited Palette
Picking a colour pallet is essential for any artwork. If you are building lots of components for a large project, it can be a good idea to create a standard pallet for the whole project. Having a project-specific pallet will keep everything looking unified, and for projects such as games, we can reserve some colours for specific things, such as the main game line, helping to keep scenes readable. While there are no hard and fast rules for pallet selection, I would recommend less or more and stick with two or three colours. You will need at least three shades for each of the colours. These are the base, mid-tone and highlight values. Sticking to such a limited pallet prevents your art from becoming noisy and hard to read; this is true of any art but is more important when you have so little space and each pixel is so prominent.
2. Consider Color Harmony
Colour theory is a huge topic in its own right, but we should take care when we are picking colours to pick ones that work well together. A simple but effective way of doing this is to pick three colours. The first two that will make up the majority of the image should be near to each other on the colour wheel, and the third should be opposite them and be there for contrast in key areas. Remember that people's eyes will go where there is the most contrast of hue and value, along with being drawn to more detailed areas.
Bringing Your Pixel Art to Life
Now you have solid understanding of the tools at your disposal and how to structure your process to make pixel art in a methodical way. Keep developing knowlage of colour theory and thinking about building simple shapes to start with and before you know it you will have a large libary of pixel art!


Comments